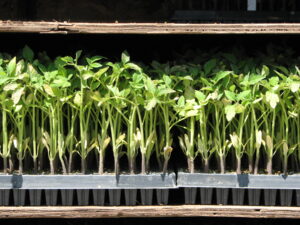
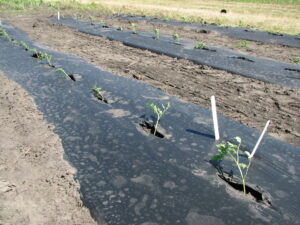
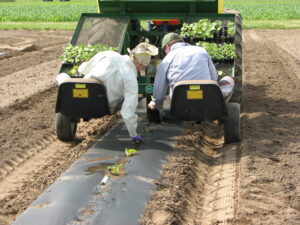
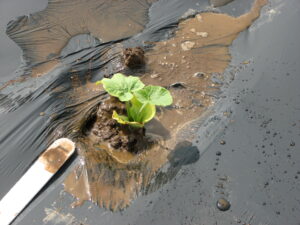
As we approach warmer days in May and June, it’s time to prepare for transplanting warm-season vegetable crops such as tomatoes, peppers, eggplant, and squash. Growers preparing vegetable transplants should plan for the process of hardening or conditioning their transplants to outdoor temperatures, light, and soil moisture conditions. By now, you should have started your transplants indoors. Greenhouse growing conditions are very different from outdoor conditions. Reduced light transmission (because of the glazing material) and controlled climatic and soil moisture conditions indoors lead to transplants that are poorly adapted to harsher outdoor growing conditions. A gradual introduction to outdoor growing stresses will result in higher carbohydrate levels in the plant, prompt additional root development, and thicken plant cell walls. Firmer and harder transplants will result in a higher transplant-establishing rate. This article will discuss the process of transplant hardening/conditioning and best practices for transplant establishment.
Hardening or Conditioning of Transplants
Purpose
- The intention is to slow plant growth, not stop plant growth.
- To reduce transplant shock by slowing transplant growth.
- To build up carbohydrate and nutrient reserves in the seedling.
- To get the plant physiologically adapted to higher light and lower soil moisture levels.
- To lower the humidity.
- To adapt the plant to temperature swings and lower temperatures.
When is it needed?
- Needed for transplants destined for open field settings.
- Might not be needed for transplants planted in a high tunnel.
- Depends on where the transplants were grown.
- Glass greenhouse-grown transplants need to be hardened.
- Transplants grown in a heated poly greenhouse need to be hardened.
- Transplants grown in an unheated high tunnel do not have to be hardened when transplanted into a high tunnel but will require some hardening for field setting.
Managing nutrients, irrigation, sunlight, and temperature
- Begin conditioning your transplants 4-8 days before setting the plants in the field.
- Move plants outdoors during the day to a shady spot when temperatures are at least 50°F (Figure 2).
- Progressively increase the amount of sunlight the plants receive.
- Move the transplants indoors at night if temperatures below 50°F are expected.
- Don’t move tender plants outdoors when windy or temperatures are below 50°F.
- During the last 2-3 days of hardening, plants can be left outside permanently in direct sunlight.
- While adjusting plants to outdoor light conditions, reduce the amount or frequency of water plants receive. Do not let plants wilt.
- Do not over-fertilize seedlings during hardening.
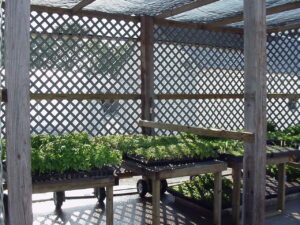
Figure 2. Transplant hardening area covered with shade cloth and lattice on the side. Lattice and shade cloth can be removed towards end of hardening period. (Photo by Liz Maynard).
Practical examples of how to do it
- Keep in mind that this is a general guide. Adjust according to your local weather conditions and timeline budgeted for hardening. Manage the conditioning process by observing your plants regularly for signs of stress.
- Below is a process growers may follow if they decide to use a shade house with different shade levels. The shade house should also protect the plants against excessive wind.
- Initially, place plants under 50% shade for 3 hours. You may choose to only use 20% shade.
- Increase the light and total time spent outside by 1-2 hours per day.
- On day 3, move the plants to 20% shade.
- During this process, return plants to the greenhouse every day. To make this easier, place plants on a wagon or cart that can easily be moved to the greenhouse or shed during the night.
- On day 6, move plants permanently outside in the full sun.
- On day 8, transplants are ready to be planted.
- Cold frames are ideal for conditioning plants and might be a cheaper solution on a small scale than a shade house.
- If you do not have a shade house, move the plants into the shade of a tree. Gradually introduce more sunlight, as mentioned above. The shady spot under the tree might change during the day. Move the transplants so that direct sunlight does not fall on them during the first few days.
- While introducing the plants to more light and variable temperatures, gradually decrease the irrigation frequency and volume.
- Monitor plants regularly. Don’t allow plants to wilt.
- Don’t withhold water to the point of seedling stress.
- Depending on your watering schedule, reduce the irrigation duration or frequency. When irrigating, wet all the substrate in the plug cell.
- Your seedlings are now conditioned and ready for transplanting.
Holding transplants
Purpose
When weather or other events don’t permit transplanting at the desired growth stage, prevent plants from overgrowing yet keep them in good condition for transplanting.
Managing fertility, irrigation, and sunlight
Manage irrigation and fertility in the same way as during the conditioning process. However, be sure to monitor for nutrient stresses and add fertility as needed.
Holding area requirements
Preferably, hold transplants in a well-ventilated shade house.
Fertilizer at Planting Time, Starter Fertilizer
- Provide readily available nutrients close to seedling roots.
- Traditionally most important in cool soils low in P.
- In systems relying on organic N, some readily available N may be helpful in cool soil.
- Apply after conditioning when seedlings are still in flats, apply in transplant water, or apply in/near the transplant hole.
‘Starter’ fertilizer is applied at the time of transplanting so that nutrients will be available near the roots of young plants. This enables the plant to take up enough nutrients to establish quickly without requiring a lot of root growth to access nutrients spread through the soil profile. Typically, it represents a small amount of the total nitrogen and potassium required by the plant and a larger proportion of the phosphorus. This is because plants do not need as much phosphorus as nitrogen and potassium, phosphorus does not readily move towards roots, and root growth is slow in cool soils.
Crops are most responsive to starter fertilizer when the soil is cool and wet and soil nutrient levels are low. This is especially true for the response to phosphorus. If the soil is warm and soil tests indicate a high level of phosphorus, less benefit from phosphorus is likely. Under these conditions, a starter fertilizer with only nitrogen could be used. In systems that rely on organic nitrogen, the cool soils of spring can lead to inadequate nitrogen availability because microbes responsible for releasing nitrogen from organic materials are not very active. Under these conditions, applying a starter organic fertilizer that contains some soluble nitrogen is likely to benefit the crop.
Starter fertilizers can be applied in several ways. One option is to fertigate seedlings while still in the flats shortly before transplanting. Another is to include fertilizer in the solution used to water in the transplants. A method appropriate for hand transplant systems is to mix solid fertilizer into the transplant hole at the time of transplanting. The table below provides examples of materials and amounts for use as starter fertilizers.
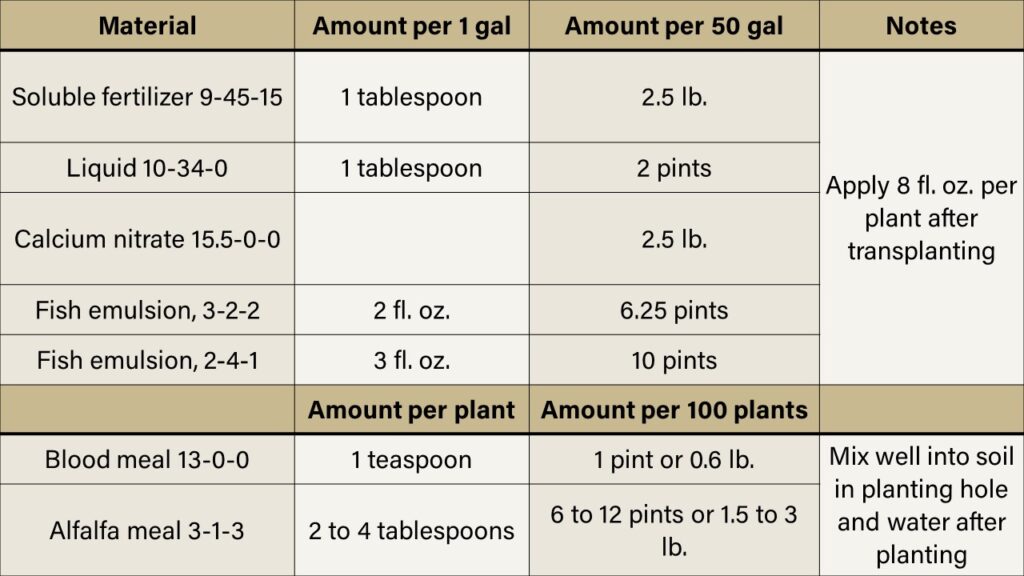
Table 1. Example materials and rates for starter fertilizer application to vegetable seedlings at the time of transplanting.
Best conditions for transplanting
- Minimum air temperature is 40°F for cool season and 50°F for warm season crops.
- Soil temperature is 50°F for cool season and 60°F for warm season crops.
- Humid, overcast, calm.
- Adequate soil moisture.
- Protection from strong winds and frost is available if needed (see Protect Early Planted Warm Season Vegetables in VCH Issue 672).
Transplants will establish best if air and soil temperatures are optimum for growth, the soil is moist, and it is overcast, humid, and not windy at the time of transplanting. Of course, it’s not usually possible to wait for ideal conditions. Air temperature should at least be above the minimum for growth, which is about 40°F for cool season and 50°F for warm season crops. To minimize risk, plant frost-tender plants after the likelihood of frost has passed if they won’t be protected by row cover. If riskier early plantings are part of the plan, consider planning for frost protection as well. For more detailed frost/freeze records, refer to A Look at the Freeze Date Tool from Midwestern Regional Climate Center from VCH Issue 713.
Soil temperature is also important. For cool season crops, 50°F is desired, and for warm season 60°F. Use a soil thermometer to check, or make use of measurements from the Indiana Mesonet. Hourly soil temperatures lag behind air temperature, so the minimum occurs mid to late morning and the peak late afternoon to early evening each day.
The water you apply after transplanting will provide soil moisture, but existing moisture is also important to consider. If too moist, the soil structure is likely to be damaged during the planting process. If too dry and rain or irrigation does not come soon, root growth may be restricted.
Windy conditions cause seedlings to lose water more quickly, and without an established root system, they can easily become stressed (Figures 3, 4, and 5). Windblown sand can create tiny wounds in leaves that open the plant to disease. Windbreaks of snow fences, strips of cover crops left standing (that can be terminated later if desired), or other vegetation can help to protect seedlings.
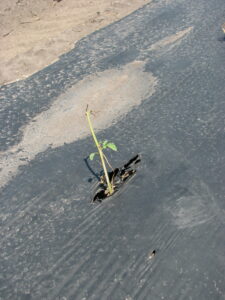
Figure 4. Wind damage on tomato seedling: leaves desiccated and main stem broken off, 2 weeks after transplanting (Photo by Liz Maynard).
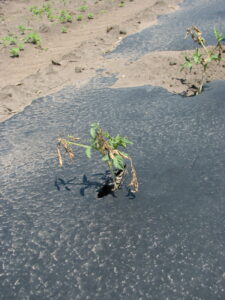
Figure 5. Tomato seedling with dead growing point and desiccated leaves from wind damage, 2 weeks after transplanting (Photo by Liz Maynard).
At the time of transplanting
- Equipment is available for many scales and types of systems.
- Water transplants thoroughly before taking them to the field and water trays in the field as needed.
- Handle seedlings with care.
- Set equipment for proper planting depth.
- Assure contact of the root ball with soil and good coverage of root ball and pot (if present).
- Water in thoroughly.
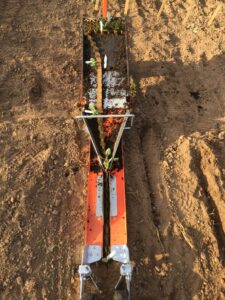
Transplanting equipment varies with farm type and scale. It may be a trowel or Hori Hori garden knife, hand-held plant setter, paperpot (Figure 8), waterwheel (Figure 6), or mechanical transplanter. Dibbles, single or rolling, don’t actually transplant but create holes for setting by hand. Whatever the method, key points apply.
Before taking seedlings to the field, water them thoroughly to saturate the growing media. Be prepared to water the trays again in the field if they dry out before they get transplanted.
It’s best to handle the seedling by the root ball and/or leaves – not the stem. A stem pinched too hard will recover with difficulty, while a torn leaf will soon be replaced with another.
Adjusting the depth of planting for the size and type of seedling is important. For all crops, plant deep enough to fully cover the root ball, the growing medium, and if the seedling is in a fiber or paper pot, the top edges of the container. If growing medium or container edges are left uncovered, they will dry out and wick water away from the root zone. Tomatoes form roots readily along the stem and can be buried up to the first true leaf or, if lower leaves have fallen off, up to the first healthy true leaf. Peppers should be covered at least to the cotyledon and may be buried up to the first true leaf. Cucurbits can be buried up to, but not over, the cotyledons or seed leaves (Figure 7). Be careful not to plant too deep when using grafted plants – the graft union should be above ground.
Especially with mechanized planting, it is important to check that plants end up planted at the correct depth and are properly covered (Figure 9). In some situations, it is worth having someone walk behind the transplanter to double-check. That person can also set plants in spots that might have been missed.
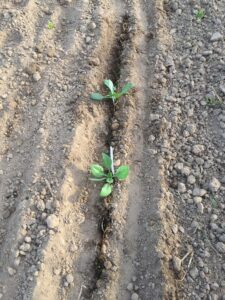
Figure 9. Spinach transplanted with a paperpot transplanter. Note how the edges of paperpot are visible above the soil surface: they should be covered so that they do not wick moisture away from roots. (Photo by Liz Maynard).
When planting into plastic mulch, ensure that the seedling stem does not constantly rub against the edge of the mulch hole. This can seriously damage the stem, especially with more tender seedlings. Windy conditions and/or high temperatures, combined with black plastic, increase the likelihood of injury to the plant stem from the plastic mulch.
Water in each plant with 8 fl. oz. of starter solution or plain water right after transplanting. Use more if it is hot, windy, and dry, and consider reducing the concentration of fertilizer in the starter solution.
Check plants in the days after transplanting. It may take a few days for them to start growing. Scout for pests that may be causing damage, such as cutworms. If some plants don’t survive, try to figure out why. Replace them within a week to minimize crop delay. If dry conditions prevail, irrigation may be needed. Your observations and notes can be used to increase success in the future.
In summary, what are the best practices?
- Harden off to reduce transplant shock.
- Use a starter fertilizer just before or at transplanting.
- Take weather and soil conditions into account when selecting the transplant date.
- Water well before transplanting.
- Handle seedlings carefully.
- Plant at the correct depth: not too deep or too shallow.
- Water in thoroughly.
- Be prepared to protect the transplants from frost, strong wind, and windblown sand, if needed.
- Check plants in a few days; note observations; replant within a week if needed.
- Plan to manage plant stress during the first 1-2 weeks after transplanting.
